Sunday, November 24, 2013

Musical chairs

Yo. It's been a while. I know everyone has been DYING for a new post.

Well you're in luck.

So my Dad gave me a pretty sweet chair a little while back which I have been using for a while:


Pretty cool, right? It's quirky. I like it.  However, the seat itself is ratty and missing padding, and also just didn't match with my color scheme.  Time to reupholster!

I figured while I was at it, I would create a stool for my vanity in my bedroom, since I was currently using a kitchen table chair.  I had been scoping out thrift stores for a funky stool or chair that would work, but with little luck.  But this morning I was sitting looking around and saw this small side table (given to me years ago by my darling Peter) that I never use and decided "Ha! I shall make you into a stool!"


Off to Joann Fabrics! While I was there I bought a half-yard of each of the following:


I also grabbed some black paint and padding.  Total cost: $12. BOOYAH.

Now, reupholstering is one of the easiest things to do.  All you need is fabric and a staple gun.  And you're done.  Sadly, I do not own a staple gun.  Off to my parents house!

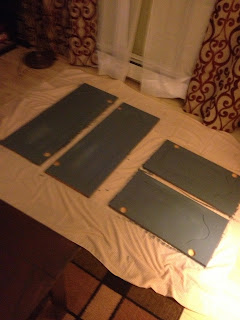
The stool, however, did require a bit more work.  Since it was brown and all my bedroom furniture is black, I had to give it a quick sand down and then a coat of black paint.  Simple enough.  Then I hot glued some foam padding on top:


Once the paint was dry, all I had to do was staple the fabric on.  I had my darling mother help me since it can be tricky to try and hold the fabric tight and staple at the same time.

The end product:


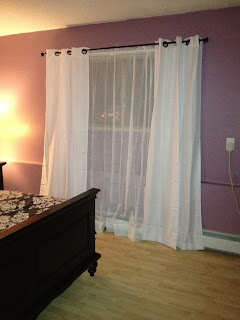
The stool in its natural environment:


The desk chair is my absolute favorite.  The fabric is EXACTLY what I was looking for! (AND IT WAS ON SALE!) I really like the orange next to the blue desk:


Awww yeah. Now I can sit in style.


What I learned:

-A half-yard was BARELY enough fabric for the desk chair.  Next time, at least 3/4.
-I should probably buy a staple gun.

Tuesday, July 23, 2013

PIMPIN' DESK!

Ok, so this may be my favorite project by far, for a variety of reasons:

-it was easy
-it was nearly free
-it's awesome

It all started when I went to Worcester this weekend. While I was convincing people to let me paint their faces (long story... but I did win a bet), the next door neighbors were getting rid of some leftover furniture.  Per usual in the dirty Woo, the pickers emerged immediately.  I noticed a cool retro desk, but dismissed it.

The next morning rolled around. It was still there. I still dismissed it. I don't need a desk. Where would I put it, Chrissy???

I went back to Twin City (Amy and Em's apartment). Upon arrival, I realized I wanted the desk.  So I made Trev-daddy claim it for me.  A few hours later, we attempted to put it in my car. After several failed attempts, we got this:


Yeah, that's not safe.

I also should mention that my dear friend Amy offered me a can of blue paint that she had at her house.  Another free find? HELL YEAH. Given my salary, free is usually what I can afford...

Well, I DID have to buy a few things... some gold spray paint, a new roller, and a paint tray. Nothing major. $9 blings.

Step 1: Remove hardware and sand

Here's the before:


It's white, a bit beat up, "shabby chic" (the cool way of referring to kinda crappy, beat up furniture).

Step 2: Paint!

Coat #1:


I got paint everywhere.  Good thing I painted on my tile floor (wipes right up!)

Step 3: Put hardware back on

And waaaalahhhh! I'm done!  It only took a few hours to do everything. This was honestly one of the easiest projects I have ever done and it might be my favorite. I now have a fabulous desk! Now maybe I'll do some work?


And did I mention it was nearly free???

Things I learned:

-blue paint is rad
-you can always get free things in Worcester
-my car is small
-the cheaper the better

HASTA LA PROXIMA VEZ!


Tuesday, June 18, 2013

Adios, ceiling fan!

I apologize in advance... not very exciting "before" and "after" shots here... but a whole lot of WISDOM.

With my copious amounts of free time, I get bored. And when I get bored, I decide to mess with my house.

Case and point #1: My kitchen ceiling fan.


Okay, okay. It's not TERRIBLE, but it's rather 90s-tastic, gives poor lighting, and I never use the fan.  So, I decided to replace it. I've replaced light fixtures before... this should be EASY PEASY.

... it wasn't.

I called up my dear buddy, Ashley, and made her come help with promises of margaritas and Mexican food.  I figured that removing a light is challenging enough as a one-woman job, so a huge ceiling fan would definitely require two sets of hands.

Once the fan was unscrewed, I realized there are a whole mess of wires involved in ceiling fans. UGHH. Instead of the typical black wire and white wire, I had two black wires, one white wire, and a red wire. What do I do? 

Turn to Youtube. Youtube did not help. Realize I need to get wire strippers. Go to hardware store. Buy wire stripper.  Return home. Call Uncle Mike (he's an electrician... handy!). Uncle Mike tells me to get wire tester. Go BACK to hardware store. Buy wrong wire tester. Return wire tester. Buy new wire tester. Return home. Call Uncle Mike. Confuse Uncle Mike. Uncle Mike relays his plan. I  put his plan into action.

And what happened next? The light worked! 

Unfortunately, anything past the light on the same circuit did not. No kitchen fan, no bathroom, no second bedroom (Sorry, Jeannie!)

Uncle Mike was stumped. Given that we were on the phone and he lives 45 minutes away, the probability that this was going to be resolved that evening was slim. WOMP WOMP.  

After a terrifying vision of my condo building and Sheesha engulfed in flames due to my terrible electric work, I bailed on my dear helper, Ashley (sorry, Ash!) and called in for reinforcements: Dad.


My dad is NOT an electrician. But, he knows how electricity works and is much more daring with live wires than I will ever be.  After mixing and matching, we had the following scenarios:

1. Light works, rest of circuit line does not.
2. Circuit line works, turn on light and the rest of the circuit turns off.
3. Circuit line works, light does not.

Fourth times the charm? Dad decided to get adventurous and put one of the black wires with the white wire (breaking the 11th commandment? Perhaps!) 

BOOM! (okay, not an actual "boom"). Success!

After hours of works, trips to the hardware store, and fear of fires... I finally have this little dinky, yet powerful light.


ALL THAT WORK FOR THAT STUPID LITTLE LIGHT.

What I learned:

-ceiling fans are heavy
-ceiling fans require more lighting
-red wires connect to the light switches
-99% of the time you NEVER connect a black and white wire
-Dad is more courageous than I am with electricity

Over and out.


Monday, June 17, 2013

Vanity rehab!

HOLLA HOLLA FOR A DOLLAH!

I have been on a DIY hiatus due to life... you know, teaching the kids, teaching more kids, having no $$... the usual. Now that it is SUMMER, expect more posts due my excessive amounts of free time.

Anyways, my father dearest is a hoarder... typical. He always gets random items from work (no, he doesn't steal them). Normally he takes the most horrendously ugly things, but for once, he got something kinda cool.

EXHIBIT A: The retro desk


I did not take a proper "before" shot, but it was a neat little vintage desk.  It was painted an off-white with light blue trim.


THE PLAN:

1. Sand
2. Repaint a fresh, crisp white
3. (GET READY FOR IT) Re-face the front of the drawer with damask print wallpaper
4. Get a new knob (the original fell off)

THE PLAN IN ACTION:

Not exactly as I had planned... per usual.

So I went to this wallpaper warehouse in North Chelmsford to check out some wallpapers and I found a bunch of cool ones.  I wanted something damask or vintage-y looking, as long as it was black and white.

However, you cannot purchase samples/small amounts of wallpaper. The sales clerk FIRMLY stated this many times, despite telling her the details of my project.  WOMP WOMP. If you want wallpaper, you have to buy a DOUBLE roll... so I would have had to pay $25 for a 12" x 2" section. Not worth it.

My "brilliant" idea? Wrapping paper! I shot over to Target and bought some pretty damask wrapping paper from the wedding isle.  Woohoo! (Side note: I promise I will quit it with the damask prints... I am reaching a damask print overload in my bedroom, but I promise it all works together!)

Then MORE brilliant ideas flew into my head: Why not top the vanity with the paper too? And put some glass down on top to keep it clean and undamaged? OH YEAHHH.  I headed on over to Lowes and got a piece of glass cut to fit the top of the vanity (Lowes cuts glass for FREE! I like anything free!). I also picked up a nice glass knob and some wallpaper glue.

Ok, time to get to work. The sanding and painting was easy (OBVIOUSLY I'M A PROFESSIONAL NOW... DUH) but the wrapping paper turned out to be a bit tricky...

As it turns out, wrapping paper does not work like wallpaper.  Wallpaper is meant to get wet, wrapping paper is not. So, my first attempts to attach the wrapping paper with the wallpaper glue resulted in a bubbly, ripped mess.  Oops.  I finally figured out that if I only used a TINY bit of glue, the paper would stick, but not get all warped. GO ME.

After placing the glass down and attaching the knob, I was done:


Check out that knob!


The vanity in its true habitat:


I'm in love! Now I have a one-of-a-kind vanity! All for the low price of $28.00!!! #winning

-desk: free (thanks, Dad)
-wallpaper: $4
-glue: $6
-knob: $4
-glass: $13
-paintbrush: $1
-paint: free (already had some!)
-sandpaper: also free (had some of that too!)

Baller status.

WHAT I LEARNED:

-Lowes cuts glass for free!
-Dad's hoarding is sometimes okay
-wrapping paper does not function like wallpaper
-wallpaper cannot be purchased in small amounts
-I can spend an un-Godly amount of time staring at knobs at the hardware store.


Peace out, cubscout.

Sunday, March 3, 2013

Chrissy and the Technicolor Kitchen

So the saga has come to a (temporary) end.

I have a multicolored kitchen.  I still haven't decided if I love it or it's the tackiest kitchen the world has ever seen.  Maybe both???

So after my staining fail (see last entry), paint was left as my only option. At first I thought to myself "well, I'll just paint it dark brown", but then I found myself watching HGTV (per usual) and decided to get adventurous!

I decided on a darkish gray-blue.  YAY COLOR!

I did a test run behind the fridge and realized I love the blue and wood tone (on the boxes), so decided upon painting the doors and leaving the boxes as-is.  A risky move!

Painting cabinet doors is MUCHHHHH easier than staining.  Maybe staining isn't for me just yet.  Paint, however, I GOT DAT ISHHH.

Since my roommate was out for the weekend, I was able to take advantage of the person-free condo and put cabinet doors ALL OVER my condo and paint them assembly-line-style. 


Very time effective.  I did the back sides (2 coats), went to Mark and Bill's and had dinner, played Settlers of Catan, and came home.  I then painted the front sides at 1:30 AM. 

My condo was such a mess :-(


FINALLY, the paint was dry and the doors were ready to go back up.  GRACIAS A DIOS I had an electric screwdriver!!!

After some clean up, this is what I was looking at:


Interesting. I really liked the look of the open cabinet, so I decided to do it again to above the fridge...


I am still up in the air.  I think whenever I decide to put in a new countertop, I may paint the boxes blue too.  I am planning on putting in a butcher block countertop, so I think the double wood tones will look weird.  In the meantime, I kinda-sorta like the multi-toned kitchen.  Regardless, I was inspired to spruce up the rest of the kitchen afterwards:


Taco night, anyone?

What I learned:

-Stain is poopy.
-Electric screwdrivers make me feel like a BOSS.
-Old tableclothes serve as poor dropclothes.  Paint goes right through them.
-Sherwin Williams will match other paints.  Very handy when the paint machine at Sears Hardware conveniently breaks when I need another quart!

Thursday, February 21, 2013

DIY FAIL: Staining cabinets

This is part one of a two part epic tale.

Ok, it's not that epic.

So, my kitchen cabinets were nice, but plain.  And that awkward in-between color. 


So I was watching some morning HGTV on my February vacation and thought, "hmmm, I have nothing to do... why not stain my cabinets?! It looks easy!"

It is, actually.

If you have untreated wood.

I, however, do not.

I did some quick research on what to do and swiftly went to the hardware store, where I bought stain, cleaner ("mineral spirits"... sounds like a vegan cocktail), sandpaper, brushes, rags and tacky cloth.

I had everything I needed.  I even called my friend Caitlin over to help out.  She's always a good voice of reason and experience (see the entry on "Chrissy vs. Grout"). 

We started off with the backs of some cabinet doors.  Cleaned, sanded, applied stain.  The stain looked so good! So dark, reddish, and warm.  Waited 15 minutes. Wiped it off. NO CHANGE.

Womp.  I didn't get the hint.  We proceeded to do 6 doors, and after Cait left, I decided to sand and stain all the boxes and drawers.  Made a huge mess. 

In the end, I stained the boxes and the backs of those 6 cabinet doors three times.  The boxes took the stain PRETTY well.  The doors... not so much.  Just a slightly darker, sticky mess. 

I took the advice from Christina (well, her mom) to go to the paint store with a cabinet door and ask if they could even be stained... and they can't.  Too dense/pressurized.  Too much staining/polyurethane already.  Womp.

However, when I stained the backs, I dribbled stain allllllllll over the fronts.  Conveniently, it stuck there.

CHOICE WORD.

I was left with a few options:

1. Admit defeat, and put doors back up with slightly unmatching boxes and spots.
2. Paint them dark brown and say goodbye to nice grain.
3. Go a little wild with color.

After several panic attacks and a visit from momma dukes, here is a preview of my solution. 


I'm not done yet.  I'm either about to make the funkiest/coolest kitchen ever... or make the f-ing ugliest kitchen ever and destroyed some decent wood cabinets. Time will tell!

WHAT A CLIFFHANGER.

Wallpaper accent wall!

So Christmas was good to me AGAIN. In addition to curtains from Mom and Dad, my darling sibling, Ronnie, got me wallpaper for my accent wall in my bedroom. 

I knew I wanted a Damask pattern, similar to my old bedspread:


I found some reasonably priced wallpaper from www.stevesblindsandwallpaper.com.

Since my mom is the wallpaper master, I needed her help for this task.  I'm not gonna lie, she did most of the work.  Why mess with perfection?

Regardless, you need some shit to wallpaper:

-long brush with short bristles (to get out bubbles)
-wooden roller (to seal edges)
-tons of razor blades
-scissors
-patience

The paper was pre-pasted, so all we had to do was get it wet.  Even though Mom did most of the work (as I politely assisted), doing only one wall is pretty simple.  I had a large pattern, so there was a lot of wasted paper, so keep that in mind.  But other than that, there were no corners or anything to make life difficult.  Here is the end product:


My room feels so elegant!!

Things I learned:

1. Don't "wing it" in figuring out how much you need.  I was so lucky! 
2. Wallpaper rips! So be careful!
3. Mom is awesome.  

Fun with chalkboard paint!

I am a child and therefore I like to draw on things. So when I saw chalkboard paint a while back, I knew I would have to get some and put it on the small wall between my kitchen and living room.

Well, I finally did.

I was actually at Lowe's to get some other ishhh, but I happened to pass by chalkboard paint and impulsively bought some.

First off, when I first moved in, there was a big hole in the wall where the previous owner had a phone line.  I knew that I was going to put my mirror from Puerto Rico on that spot, so I did a really shitty job of patching the hole. But nobody knew!


Muahahahahahahahaha.

So I guess I had to actually patch the damn hole.  Fortunately, they sell HOLE PATCHING KITS! #winning.


Very simple. Put on mesh. Add spackle. Let dry. Sand. On a scale of one to Kim Kardashian, definitely a KK.


Step two: Paint!!

Again, pretty simple.  However, the paint is rather watery, so I had to do four coats.  


Step three: DRAW!

Here is my Nemo-themed wall:


And here is my Presidents' Day themed wall!


Things I learned:

1. Chalkboard paint is awesome.
2. Chalkboard paint takes more coats than I thought.
3. Chalkboard paint is awesome. 


Window Treatments!

IT'S ABOUT DAMN TIME, CHRISSY.  I had these TERRIBLE vertical blinds in all of my rooms:


Ew ew ew.

So I wrote a lovely letter to Santa/Sue Gill and asked for some curtains.  Apparently I'm not the big asshole I think I am, because I didn't get coal and I got my curtains! WOOHOO.

I obviously put them up the very next day. DUHH.

I had to go to Hell (Walmart) first to get rods and liners.  All together the additional supplies were only about $50... not bad! I also invested in an electric screwdriver.  SO CLUTCH.

So here's my re-vamped living room:


And my bedroom:


And my second bedroom:


Things I learned:

1. Curtains are expensive.  Ask Santa for them.
2. Electric screwdrivers are awesome.
3. Electric screwdrivers are not drills :-(
4. Sometimes you need to use a nail to start a hole (see #3)
5. Curtain liners make all the difference in the world!